Pages

2/14/2018

Rose methods

As I mentioned last post, there are a few different ways you can go about tatting this rose.
First off, by looking at them you can’t tell a difference visually in the methods so it is really about how you are comfortable tatting it. I can see the benefit of each and depending on what is on my shuttle or how I feel that day would choose any if them over the other.

Method 1
The original way I designed it. Shuttle and Ball.  I just arranged the threads in the right position at the arc changes. A shoelace trick could have maybe should have been used here but it worked so well without it, I didn’t bother. It was smooth and easy and lies flat. No added bulk. A benefit is you only need a small amount of thread wound on a shuttle. 


Method 2 
Per Judith Connor’s suggestion to use the reverse join. It is an easy join. Shuttle and ball. I think it does add a wee bit of extra bulk compared to method 1 but is considered the more proper way of doing it. It does get threads in the right position and lies flat and you only need a small amount of thread wound on a shuttle. 


Method 3
Per Muskaan’s suggestion as she and I worked on getting the pattern ready to share: CTM with 2 shuttles. Of course it also lies flat and you can use the appropriate shuttle at each arc change without issue. I liked this for clarity on diagraming and reading the pattern as you learn to tat it the first go around. It helped keep arc direction more obvious. My only issue is I mismeasured thread getting shuttle in hand and thread source mixed up when I was doing math. I have notated that so I don’t make the same mistake as easily again. 
Have Fun! 
I have stems to tat. 


2/13/2018

Valentine variations

When I first adapted Vicki’s “Roses are Red” pattern I used the method she had used (shuttle and ball) to make the adaptation. My early notes looked like this.

ADAPTATION for Rose 

by Coretta Loughmiller 

Oct 2016
rw= reverse work 
tw=turn work 
lj=lock join
vsp=very small picot 

R: 5-5 rw 
1Ch:1 vsp 9 lj turn work
2Ch: 4 vsp 12 vsp 3 lj 12 to vsp on ring turn work
3Ch: 6 vsp 21 lj (2nd vsp on ch 2) tw 
4Ch: 8 vsp 19 lj (vsp on ch 3)
5Ch: 3 vsp 9 vsp 4 lj to (1st vsp on ch2) tw
6Ch: 5 (2nd half 2d) turn 3 lj to picot tw 
7Ch: 9 vsp 6 lj 6 vsp 15 vsp 5 lj tw
8Ch: 7 2nd half ds turn 7 lj turn 14 vsp 7 vsp1 lj 2 vsp 13 Tie and cut.

I was just moving the thread where I wanted it at the arc changes. When Muskaan started helping me go through the pattern she suggested 2 shuttles. This always gave you the option of having enough thread in the right direction. It made good sense. We went ahead and diagrammed and layed out the pattern that way. 

Upon posting it on Craftree Judith Connors suggested the reverse join. Therefore being able to use shuttle and ball and not having to wind and unwind shuttles at each arc change. I am pretty sure I have heard of this join and used it, but never put the two together. Sometimes you just do something because it works and you don’t know the name for it. 

I had hopes to try out the pattern using the reverse join before today and share what is great about each method, but I am a mom with 4 kids and a husband that travels, to say the least. So it’s up to you to choose which method suits your knowledge and tatting style. 

In the mean time here are some I tatted using the two shuttle method. All the ones on the previous post used my original adaptation notes and method. 

The great thing is if you have a preference you can tat it according to your preference. As many have said before me, though perhaps different context: 
The knot cares not how it is made. 
Happy Tatting! 

I am trying to pick back up blogging, but in the mean time if you are on Instagram you can find my tatting and other art @corettadeesign

2/11/2018

A Valentine for you


A while back I was looking for a rose pattern to tat. A friend had requested rose bookmarks for her two emergent readers. I went hunting for a pattern assuming there would already be one,  I found Vicki Clarke's rose and liked the premise but needed a bit different angle for what I had in mind. You can find Vicki's rose here. Since her original pattern was free I figured my adaptations would be too. It has been a long time in the making getting it ready to share though. I had my pattern notes and good intentions to diagram it and lay it out in PDF and had reminders as people kept asking for it. however, I rarely sit down to the computer these days and some things I just have to do at the computer. Add in a myriad of other things in life, sickness, and technology and here we are over a year later. That's embarrassing.
 
So it came up again and I decided it was time to get moving on it. I started to lay it out but found days going by without more work on it. Enter Muskaan who has delighted me with her "how else can it be accomplished" and "look what else you can do with this" etc. Seriously take a look at her blog. She contacted me and offered to help me on it. At first I was like, "naw, I'm a graphic designer, I can do this." Then I remembered that can and doing and done are different things. Besides it's always good to have a test tatter and another set of eyes looking at and proofing. And I couldn't have had a better set of eyes on it. Muskaan asked the right questions and we reorganized the method of tatting the pattern. It can be done with shuttle and ball as I originally did it based off of Vicki's pattern or it can be done quite simply with two shuttles CTM. I decided to use the latter for the pattern instructions. 
Over the course of all this I have tatted the rose part a number of times and then added options like a stem with a bud and a version for earrings. These are also on the pdf. There are so many more options, a bigger leaf, thicker stem etc. etc. So put your own touch on it, and then come back and share it with me. I'd love to see it! So get to the good part right? See the PDF below. If you tat this item please make sure you give credit where it is due, and for the love if you pin it, make sure it links back to the source! Happy Valentine's Day! Share the love. 


1/17/2018

Chokers

Chokers are making their come back, which I love. You can get oodles of cheap plastic chokers or you can get something special. 


Here are a few of the designs I’ve tatted up in the last while. They are available and more in my Etsy store. If you see something you love but want it in a different color let me know! I’d be happy to make something custom for you. All custom orders require a $20 deposit.

Right now I’m working on one adapted from a pattern from 1921. If you’d like to see more up to date works I post on Instagram @corettadeesign much more frequently than I blog these days. 


6/22/2017

Glass Adventures

Recently I have been working with glass as well as my tatting adventures. This has been something I have long wanted to do and though I have done stained glass I wanted to try glass fusing. I love making the glass sandwiches and sharing in the experience with others. So when I have extended visitors I often rope them into making their own glass pieces. Throwing aside all the "I'm not artistic comments." The best part of glass is that if it doesn't quite turn out you can cut it up, re-layer and fuse it again to make something else.  It's always awesome to see the transformation of the glass. Here are a few examples. Including ones that I guided others through making. To purchase finished pieces you can contact me directly or see what I currently have listed on my Etsy page. I don't have all of them listed there so if you see something that catches your eye let me know and I'll see if it is still available. I post current artistic adventures on my instagram account.

 A very subtle black dirchroic glass with blue,

 This was a set I helped my sister make. She only wanted earrings until she saw the pendant I made to match them. :)

 I love the little glass stud earrings, one of my new favorite pieces of jewelry.
This was obviously not a fusing job, but a way to preserve a loved one's handwritten recipe for a dear friend. I sandwiched it between glass and soldered it together for a wall hanging.
I've done something similar with some antique tatting another friend found and gave to me. Of course I had to give her the pick of the three pieces. 

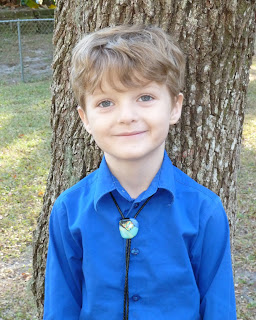
Bolo ties are something I have made quite a few of. Making them was inspired by my youngest son's love for his primary church teacher who wore bolo ties frequently. My son wanted one too. So I helped him make one for himself and for his teacher as a Christmas present. Too bad we didn't get a picture of them wearing their bolo ties together before he moved.
 Bolo ties designed by my sons.

 My youngest son wearing his bolo tie that he designed.
This fused and then slumped dish was a fun first try. 
 Slumped IBC bottles make awesome and fun spoon rests.
 And to think it mostly all starts something like this little glass sandwich.


3/05/2014

Integrity Doily

I was asked once what shape my name was.
Huh?
What color is it?

Think about it what color would your name be? What shape?

I decided my name would be a yellow triangle. I don't even like yellow, not really. But that's what it sounds like. It has sharp sounds like a triangle and is unique and bright, it kinda sends up alert flags when you see it for the first time. How many times have I been sitting waiting for roll to be read off and I simply raise my hand when there is a long pause? All my life. I'm good with it.

So when I set a goal to design a doily in tatting for Personal Progress I listed out what that value meant to me in my journal, what color it was, what shape, what it represented, what it was composed of.

Guys, Integrity is purple. It's the royal color, of loyal and royal bloodlines, it's one of the most sought after values in the world. It is the heart of all other virtues and values. It's living your truth, it's living God's standard in everything. I know of one person who had it down solid in their life: Jesus Christ.

Integrity is purple, and it's a triangle. Why a triangle? It represents the Godhead, it represents our relationship to God among other things. To me it is also a knot, an unending knot. A Celtic knot. So in the very center of the doily I created a Celtic knot to build from. Then I encompassed it.
I worked at it.
It took on a triangular shape again. I have it in my head to keep building on it but first I need to write down the pattern already there. For the time being it met the parameters I set for myself to complete the project in time. Now, just like the value it represents I need to keep working at it.

Ceramic Shuttles

Since my first go at making my own ceramic shuttle went so well I decided to try it again.
This time I made 3.
greenware
bisque
glaze
glaze

done
done

They all work but one is definitely suited for larger thread as the tips don't touch enough for thread size 20 or smaller.

I love the sound they make though. Next time I plan to try a slightly different shape. 

10/14/2013

Halloween printable

I needed a new Halloween sign for my mantle  (The neon orange one just didn't go with the grunge we put up this year) and so I threw this together with free vector graphics this morning. It features the last part of Edgar Allan Poe's poem Spirits of the Dead.

Two versions, Large text and smaller text.


Ah, that's what the mantle was missing. I might rearrange it a bit yet and put in the one with large text, but at least all the components are there.

9/25/2013

More preschool coloring

Since my last post my 4 year old has drawn me many pictures, she usually does, but some of them have come with the request for me to color them.
Here's the latest: A whimsical lil frog
She also left presents on my bed last night, a picture and a small paper folded and taped shut where she demonstrated that our practice on the letter e's correct formation was totally worth it.

9/09/2013

A little Fairy magic

My little Tattie Princess continues to inspire me. The other day while waiting for her older brother I handed her and her little brother paper and pencils to keep them occupied. She drew a sweet picture which I immediately loved and her little brother almost as quickly drew over. I had taken a snap of it on my ipod though before he did. So I used my new wacom tablet to recreate her drawing and add some color etc. I printed out a copy to hang on our little art wall and am excited to see her reaction when she gets home.

5/01/2013

Happy 4th Birthday to Tatties! (a birthday giveaway)

Oh goodness me! Four years have I been leaving little 1 inch thread snippings all over the house to vacuum later as I have created butterflies, animals and flowers. All in the name of lace and pretty things.

An artist by heart and education, a mother by choice, has left me to find an outlet that I could easily pick up and set down without much mess and danger to the children. My sister taught me tatting and I happened to use it one day on my newborn instead of a ribbon bow and fell in love.

Tatties are low profile, and adhere to the scalp with a water soluble agent, some favorites:
ky gelly / surgical jely
karo syrup
honey
glue stick
white glue

They can stay on for days, and easily wash off with water and are totally reusable.  Much less cumbersome than the headbands that always made my baby angry. :)

In celebration Tatties will be giving away a Mother & Daughter Tattie Butterfly set (Necklace and matching Tattie) in Hot Pink. 
Tattie jewelry is lightweight and elegant in tons of tiny knots.

I'm going to be a big girl this year and use Rafflecopter.

Mandatory Entries:
      Comment on this blog post if you would keep or give this prize as a gift.
      Be a Fan of Tatties on Facebook
      Share the Etsy site on Facebook
Extras
      Share the Giveaway on Facebook 
      Tweet (I don't have a Twitter account but I'll accept the benefits of fans having one! :)

Giveaway starts May 3rd 12am Eastern and will be taking Entries til May 8th 12am.

Have Fun! and Good luck! I will announce the winner on Tattie's facebook page and this here blog. I will also contact the winner directly as best I can, having a legit email associated with your profile would be good. If I do not receive contact and necessary info for sending the prize for 48 hours I will pick another winner.
a Rafflecopter giveaway

4/17/2013

Piggy Pig Pig Pattern

The pig pattern I set in motion a looong time ago has re-surfaced. I finally gave it some love and test tatted the pattern and typed up a pattern for it. The pattern comes in two versions for how you choose to work: contiguously or in rounds.$3 Contact me via email or find on my Etsy site.
In Rounds

Contiguously